You have a beautiful logo or artwork saved as a JPEG or PNG. It looks crisp on your computer screen, so you send it off to a print shop or an embroidery service. Weeks later, the final product arrives, and your heart sinks. The edges look jagged. The colors appear muddy. Small details vanish into blurry blobs. This happens more often than you think, and the root cause is almost always the same: you started with a raster image instead of a clean, scalable vector file. That is where vector tracing saves the day.
What Exactly Is Vector Tracing and Why Does It Matter?
Vector tracing converts pixel-based raster images (like photos, scanned logos, or low-res web graphics) into mathematical paths. Instead of storing color information in a grid of tiny squares, vector files store lines, curves, and shapes as formulas. You can scale a vector logo to the size of a billboard or shrink it down to a business card, and it will remain perfectly sharp every time. For print production, that means no pixelation. For embroidery, that means clean stitch paths without guessing where edges begin and end.
When you trace a design properly, you rebuild it from scratch using bezier curves, anchor points, and precise geometric shapes. A skilled tracer examines the original artwork, identifies each color region, and redraws every curve with intention. The result is a clean, organized file that any production house can open and use immediately. No surprises. No apologies.
The Nightmare of Raster Graphics in Print Production
Printing presses and large-format printers work best with vector files. Send them a raster image at 300 DPI, and they will print it. But if that image needs to enlarge beyond its native resolution, the printer interpolates missing pixels, creating soft edges or stair-stepped lines. For professional print work like brochures, banners, or product packaging, that fuzziness screams amateur.
Vector tracing eliminates this problem entirely. A traced logo becomes resolution-independent. You can scale it to any size without losing detail. Additionally, vector files support spot colors, which are essential for brand accuracy. Pantone colors stay true across different print runs and substrates. Raster images rely on CMYK or RGB mixing, which shifts from one printer to another. With a traced vector file, you lock in your brand colors once and use them everywhere.
Print shops also appreciate vector files because they separate colors automatically. When you order screen-printed t-shirts, the printer needs a separate screen for each color. A well-traced vector file provides those color separations instantly. A raster image forces the printer to guess or manually rebuild the artwork, adding time and cost to your project.
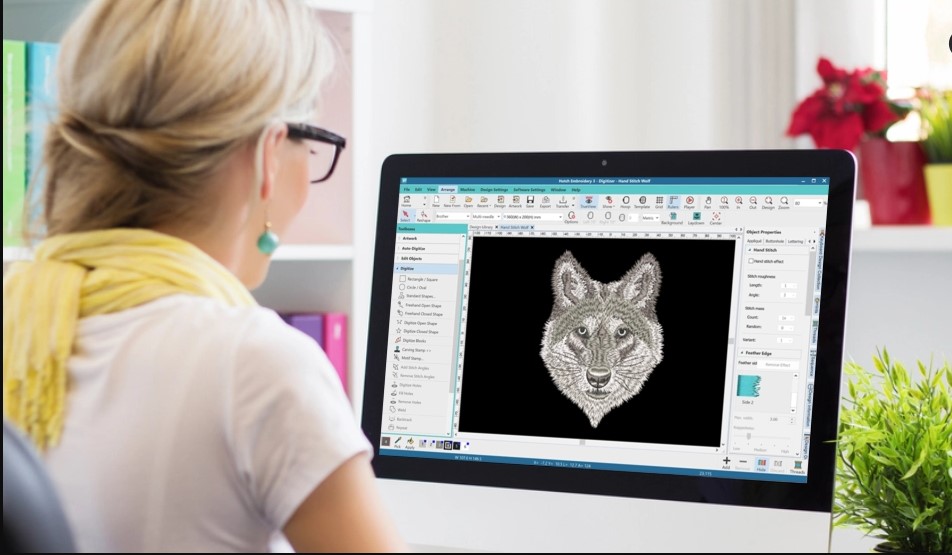
How Vector Tracing Saves Your Embroidery Projects
Embroidery digitizing software works best with vector input. A professional digitizer imports a vector file and uses its clean paths to assign stitch types, directions, and densities. Jagged edges from raster images confuse the software. It tries to approximate the stair-stepped pixels, resulting in bumpy outlines, uneven fills, and unpredictable thread trims.
Vector tracing gives embroidery digitizers exactly what they need: smooth curves, consistent stroke widths, and clearly defined fill areas. When a digitizer sees a clean vector file, they know exactly where to place satin borders, where to switch to tatami fills, and how to handle sharp corners. The final stitch-out matches your original design with remarkable accuracy.
Consider a logo with a curved letterform like an ampersand or a script font. In a raster image, that curve becomes a series of tiny pixel steps. The digitizer must guess the true arc. With a traced vector, the curve exists as a perfect mathematical arc. The digitizer follows that arc precisely, creating a smooth, elegant stitch path. You notice the difference immediately. Professional embroidery looks fluid and natural. Pixel-based embroidery looks stiff and clunky.
The Technical Side: Paths, Curves, and Clean Edges
Vector tracing is not magic. It requires a human eye and steady hand. Good tracing software like Adobe Illustrator, CorelDRAW, or Inkscape provides pen tools and bezier curve controls. A skilled tracer places anchor points at the logical extremes of a curve, then adjusts the handles to match the original artwork’s shape. Too few anchor points create flat, unnatural bends. Too many anchor points create bumpy, over-complicated paths.
For print, clean vectors mean crisp reproduction at any scale. For embroidery, clean vectors mean predictable stitch placement. A traced shape with a smooth outline translates directly into a satin stitch that follows that same smooth path. A shape with dozens of tiny anchor points forces the digitizer to either simplify the path or accept a bumpy stitch-out. The tracer’s skill directly impacts the final product’s quality.
Color reduction is another benefit. Raster images often contain thousands of colors due to anti-aliasing and compression artifacts. Vector tracing flattens those into distinct, solid color regions. A traced logo might have only three or four colors, even if the original scan looked muddy. This reduction simplifies both print separations and embroidery thread changes. Less complexity means lower production costs and faster turnaround times.
Vector Tracing vs. Auto-Trace Tools – Know the Difference
Every major design program includes an auto-trace feature. You click a button, and the software attempts to convert your raster image into vectors automatically. For simple, high-contrast images like black-and-white line art, auto-trace sometimes works. For complex logos with gradients, drop shadows, or overlapping colors, auto-trace produces a mess of hundreds of tiny, overlapping shapes. Those shapes look terrible when printed and become an absolute nightmare for embroidery digitizing.
Professional vector tracing happens manually. A human tracer examines each part of your design, decides the best way to reconstruct it, and builds clean, efficient vector shapes. They ignore noise and artifacts. They simplify where possible. They ensure that every curve flows naturally. The difference between an auto-traced file and a manually traced file shows up immediately in the final print or stitched product. One looks professional. The other looks like a cheap copy.
Invest in manual tracing for any logo or design that represents your brand. Auto-trace works for rough drafts or internal sketches. For customer-facing production, always choose human-guided vector tracing.
Why Needle Digitizing Relies on Precise Vector Art
When you work with an embroidery digitizing partner like Needle Digitizing, the quality of your vector art directly affects the speed and accuracy of your stitch files. Clean vectors allow their digitizers to focus on creative decisions like stitch angles and underlay patterns instead of wasting time fixing broken paths or redrawing blurry edges. They can deliver your finished embroidery files faster, with fewer revisions, and with higher consistency across multiple runs. Providing a well-traced vector file upfront is one of the easiest ways to get professional embroidery results without endless back-and-forth.
Practical Steps to Get Your Artwork Vector-Ready
You do not need to become a tracing expert overnight. Follow these steps to prepare your artwork for either print or embroidery.
First, locate the highest resolution version of your logo. A 300 DPI PNG or JPEG at least 2000 pixels wide works best. Avoid images pulled from a website or a social media profile, as they are too small and compressed.
Second, decide whether to trace it yourself or hire a professional. If you have experience with the pen tool in Illustrator or Inkscape, watch a few refresher tutorials and practice on simple shapes. For complex logos with gradients, text, or multiple overlapping elements, hire a dedicated vector tracing service. The cost is minimal compared to the headache of failed print runs or embroidery mistakes.
Third, when you trace, work in layers. Create a layer for each color or each major design element. Lock layers you finish to avoid accidental edits. Use consistent stroke weights and avoid converting strokes to outlines unless necessary for the design.
Fourth, save your final file in a universal vector format like AI, EPS, PDF, or SVG. Do not embed raster images inside the vector file. That defeats the purpose. Check that every element remains scalable by zooming in to 6400 percent. If you still see smooth curves instead of pixel blocks, you succeeded.
Finally, keep a master vector file and export copies for specific uses. For print, provide CMYK or spot color versions. For embroidery, provide a solid color version without gradients or effects. Your production partners will thank you.
Conclusion
Vector tracing transforms fuzzy, unreliable raster artwork into crisp, professional, and infinitely scalable designs. For print, it guarantees sharp edges, accurate colors, and smooth separations. For embroidery, it gives digitizers the clean paths they need to produce flawless stitch-outs. Auto-trace tools cannot match the precision of a human hand and eye. Whether you trace your own logos or hire a specialist, the investment pays off in every brochure, banner, t-shirt, and jacket you produce. Stop sending pixelated images to your production partners. Start every project with a clean vector trace, and watch your design quality soar.